Biryani is one of those dishes that needs no introduction. For many of us, just the aroma of freshly cooked biryani is enough to trigger cravings. It is more than just rice mixed with spices—it’s a royal dish with centuries of history and countless regional variations across India.
But here’s the problem: traditional biryani cooking (known as dum cooking) takes a lot of time, patience, and skill. It involves slow-cooking rice and meat/vegetables in a sealed pot for hours. Most of us, juggling work and family, simply don’t have that luxury.
The good news? You can make delicious, authentic-tasting biryani in a pressure cooker—and it’s faster, easier, and perfect for beginners. In this blog, you’ll learn everything you need to know about making biryani in a pressure cooker, step by step.
What Exactly is Biryani?
Biryani is a layered rice dish made with basmati rice, meat (chicken, mutton, fish), or vegetables, flavored with aromatic spices like cardamom, cinnamon, cloves, and herbs like mint and coriander. It usually has a base masala made with onions, tomatoes, yogurt, and ground spices.
Unlike plain pulao, where rice and spices are cooked together, biryani has a distinct layering technique:
- Masala layer (meat/vegetables cooked with spices)
- Rice layer (parboiled or soaked basmati rice)
- Herbs & garnish (mint, coriander, saffron milk, fried onions)
This layering, followed by slow “dum” cooking, makes biryani rich in aroma and taste.
When made in a pressure cooker, the same principle is followed, but the cooking time is reduced drastically while still locking in the flavors.
Read also: How to Make Pulao 5 Ways
Why Use a Pressure Cooker for Biryani?
Many people hesitate to use a pressure cooker, thinking it may ruin the biryani texture. In reality, if you follow the right steps, a pressure cooker can make biryani just as good as traditional dum biryani.
Here’s why it works so well:
- Faster cooking: What normally takes 2–3 hours can be done in under 1 hour.
- Even steaming: The cooker traps steam, ensuring both rice and meat/vegetables cook uniformly.
- No flavor loss: The sealed lid helps retain the aroma of spices.
- Beginner-friendly: No need to constantly monitor flame or layers—it’s almost foolproof.
Essential Ingredients for Pressure Cooker Biryani
The flavor of biryani depends on quality ingredients. Here’s a detailed list:
Rice
- Basmati rice is best (aged for at least a year).
- Soak for 30 minutes before cooking for fluffy, separate grains.
Protein/Vegetables
- Chicken (bone-in for more flavor, 500 g for 2 cups rice).
- Mutton (needs pre-cooking as it takes longer).
- Vegetables (carrots, beans, cauliflower, peas, potatoes, paneer).
Spices & Herbs
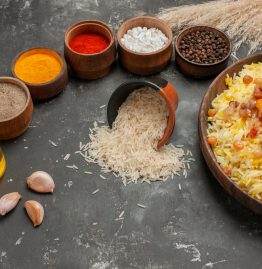
- Whole spices: bay leaves, cinnamon, cardamom, cloves, peppercorns, star anise.
- Powdered spices: turmeric, red chili powder, coriander powder, garam masala, biryani masala.
- Herbs: fresh coriander, mint leaves.
Others
- Yogurt (½ cup, makes meat tender and adds richness).
- Tomatoes (2, medium-sized).
- Onions (3–4, thinly sliced, fried golden).
- Ghee or oil (ghee gives royal flavor).
- Optional: saffron soaked in warm milk.
Water Ratio (very important)
- Rice : Water ratio in cooker = 1:1.5 (for fluffy rice)
- For softer rice, use 1:2 ratio.
Step-by-Step: Chicken Biryani in Pressure Cooker
Step 1: Prepare Rice
- Wash basmati rice until water runs clear.
- Soak for 30 minutes, then drain completely.
Step 2: Fry Onions & Spices
- Heat 4 tbsp oil/ghee in cooker.
- Add whole spices (bay leaf, cinnamon, cardamom, cloves, pepper).
- Add sliced onions, fry until golden brown.
Step 3: Add Masala Base
- Add 2 tbsp ginger-garlic paste. Fry until raw smell disappears.
- Add 2 chopped tomatoes, cook till soft.
- Add ½ cup curd, mix well.
Step 4: Cook Chicken
- Add 500 g chicken, salt, turmeric, chili powder, coriander powder, and biryani masala.
- Cook until chicken turns white and masala releases oil.
Step 5: Layer Rice
- Spread drained rice over chicken masala.
- Sprinkle chopped mint, coriander, and saffron milk.
- Add 3 cups water (for 2 cups rice).
Step 6: Pressure Cook
- Close lid.
- Cook on high flame for 1 whistle.
- Reduce to low flame for 5 minutes.
- Switch off and let pressure release naturally.
Step 7: Serve
- Gently fluff with fork (don’t stir hard).
- Garnish with fried onions, mint, and raita.
Mutton Biryani in Pressure Cooker
Mutton takes longer than chicken, so here’s the method:
1. Pressure cook mutton pieces with salt, ginger-garlic paste, turmeric, and 1 cup water for 3–4 whistles until tender.
2. Prepare masala base (onions, tomatoes, spices, curd).
3. Add cooked mutton with stock.
4. Layer soaked rice and water.
5. Pressure cook for 1 whistle on high + 10 minutes on low.
6. Rest and serve.
Vegetable Biryani in Pressure Cooker
For vegetarians:
1. Fry onions, ginger-garlic paste, and whole spices.
2. Add mixed veggies (carrots, peas, beans, potatoes, cauliflower).
3. Add tomatoes, curd, and spices. Cook 3–4 minutes.
4. Layer rice, herbs, and water.
5. Pressure cook 1 whistle + 4 minutes on low.
6. Garnish with fried cashews or paneer cubes.
Pro Tips for Perfect Biryani in Cooker
✅ Use aged basmati rice for long, fluffy grains.
✅ Always soak rice for at least 30 minutes.
✅ Don’t stir after layering rice—this keeps grains separate.
✅ Use ghee instead of oil for authentic taste.
✅ Let biryani rest for 10 minutes before opening lid.
✅ For richer taste, add fried cashews, raisins, or boiled eggs.
Common Mistakes to Avoid
❌ Adding too much water → mushy rice.
❌ Releasing pressure immediately → rice breaks.
❌ Not sautéing onions properly → reduces depth of flavor.
❌ Overcooking vegetables → they turn mushy.
❌ Skipping fresh herbs → biryani loses fragrance.
Serving Suggestions
Biryani is best enjoyed hot, with sides like:
- Raita (boondi, cucumber, or onion-tomato).
- Mirchi ka Salan (spicy Hyderabadi curry).
- Papad or pickle for crunch.
- Green salad with lemon.
FAQs
Q1. Can I make biryani without soaking rice?
Yes, but soaked rice cooks evenly and gives fluffy grains. Without soaking, rice may break or cook unevenly.
Q2. Can I cook biryani without onion and garlic?
Yes, you can replace them with more tomatoes, ginger, and yogurt. However, onions add depth and sweetness to biryani.
Q3. Why did my rice turn sticky?
Sticky rice happens if water is extra, rice is not soaked, or the flame is kept too high after 1 whistle. Use exact water ratio for best results.
Q4. Can I store biryani for the next day?
Yes. Refrigerate in an airtight container for 1–2 days. Reheat by sprinkling little water and covering the pan to keep rice moist.
Q5. Can I make biryani in an Instant Pot instead of pressure cooker?
Absolutely! Instant Pot works like a pressure cooker. Use same steps but cook for 5 minutes on manual pressure and let pressure release naturally.
Final Thoughts
Making biryani in a pressure cooker is one of the easiest ways to enjoy this royal dish at home. With the right rice-to-water ratio, fresh spices, and correct cooking time, you can prepare restaurant-style biryani without hours of effort.
Whether it’s chicken, mutton, or vegetable biryani, this one-pot recipe will save you time while keeping the authentic taste intact. So next time you crave biryani, just bring out your pressure cooker—and treat your family to this fragrant, mouth-watering delicacy.


