


 Follow Us
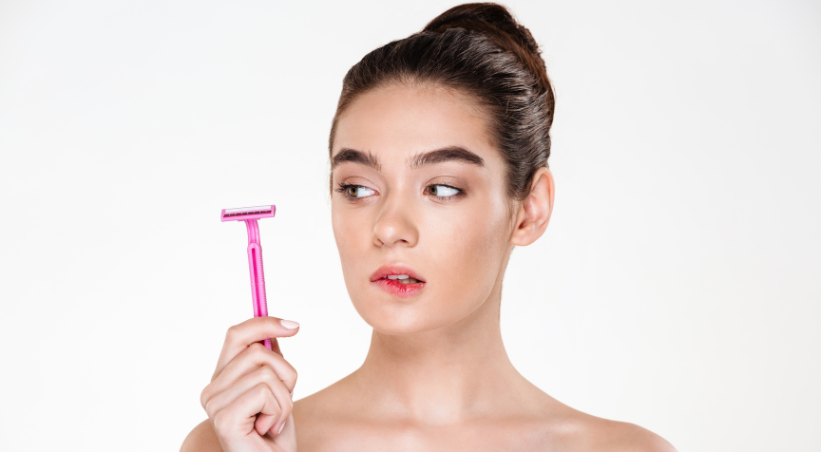
Achieving glass skin with razors has become one of the most sought-after beauty trends, and for good reason. This Korean beauty-inspired technique, also known as dermaplaning, offers a simple yet effective way to transform your complexion into a smooth, luminous canvas. If you’ve been dreaming of that coveted translucent glow where your skin looks as clear and reflective as glass, you’re in the right place. In this comprehensive guide, we’ll explore how facial razors for glass skin can help you achieve professional-quality results from the comfort of your home.
The beauty of using razors for dermaplaning lies in their dual action: they gently exfoliate dead skin cells while simultaneously removing fine facial hair (peach fuzz), creating the perfect foundation for that enviable glass skin effect. Whether you’re a skincare enthusiast or a beginner looking to elevate your routine, understanding the proper techniques and best practices will help you safely unlock your skin’s natural radiance.
Understanding Glass Skin and the Role of Razors
Glass skin refers to a complexion so smooth, clear, and luminous that it appears almost translucent—like glass. This aesthetic originated from Korean skincare culture and has taken the beauty world by storm. The key characteristics include:
- Exceptionally smooth texture without visible pores
- Dewy, hydrated appearance with natural luminosity
- Even skin tone free from dark spots or blemishes
- Reflective quality that catches light beautifully
Dermaplaning with facial razors plays a crucial role in achieving this coveted look. By removing the outermost layer of dead skin cells and vellus hair (peach fuzz), you create an ultra-smooth canvas that reflects light evenly, enhancing your skin’s natural glow.
How Dermaplaning Creates Glass Skin
When you use a specialized facial razor, you’re performing physical exfoliation that:
- Removes dead skin buildup that causes dullness and uneven texture
- Eliminates peach fuzz that can trap dirt, oil, and makeup
- Stimulates cell turnover for fresher, healthier skin renewal
- Enhances product absorption by up to 80%, allowing serums and moisturizers to penetrate deeper
- Creates an airbrushed finish for flawless makeup application
Benefits of Using Razors for Glass Skin
The popularity of facial razors for achieving glass skin continues to grow because of the remarkable benefits this technique offers:
Immediate Visible Results
Unlike many skincare treatments that require weeks to show results, dermaplaning delivers instant gratification. After just one session, you’ll notice:
- Visibly brighter and more radiant complexion
- Smoother skin texture that feels like silk
- Reduced appearance of fine lines and wrinkles
- Enhanced overall skin clarity
Enhanced Skincare Efficacy
With the barrier of dead skin cells removed, your skincare products work significantly better. Active ingredients in your serums, moisturizers, and treatments can penetrate more effectively, maximizing their benefits for improved hydration, firmness, and overall skin health.
Improved Makeup Application
Facial hair removal through dermaplaning creates a flawless canvas for makeup. Your foundation glides on seamlessly without catching on peach fuzz, preventing the cakey appearance that many people struggle with. The result is a professional, airbrushed finish that lasts all day.
Cost-Effective Alternative
Professional dermaplaning treatments at spas or dermatology clinics can cost between $100-$250 per session. At-home dermaplaning with quality facial razors offers comparable results at a fraction of the cost, making this luxurious treatment accessible to everyone.
Safe and Non-Invasive
When performed correctly with proper tools, dermaplaning is a gentle, painless procedure suitable for most skin types. It doesn’t require downtime, allowing you to continue your daily activities immediately after treatment.
Essential Tools and Products You’ll Need
Choosing the Right Facial Razor
Not all razors are created equal. For optimal glass skin results, you need specialized tools designed for delicate facial skin:
Professional-Grade Dermaplaning Razors:
- Feature surgical-grade stainless steel blades
- Include protective guards to prevent cuts
- Offer ergonomic handles for better control
- Come in disposable or reusable options
Key Features to Look For:
- Sharp, precision-engineered blades (typically Japanese steel)
- Safety guards to minimize irritation risk
- Comfortable, non-slip grip handles
- Appropriate blade angle (typically 10-15 degrees)
Complementary Products for Best Results
To enhance your dermaplaning experience and protect your skin:
Pre-Dermaplaning:
- Gentle, pH-balanced cleanser
- Optional: lightweight facial oil for dry/sensitive skin
Post-Dermaplaning:
- Hydrating serum (hyaluronic acid-based)
- Soothing moisturizer with ceramides
- Broad-spectrum SPF 30+ sunscreen
- Optional: calming face mask
Step-by-Step Guide: How to Get Glass Skin with Razors
Follow these professional dermaplaning techniques to achieve salon-quality results at home:
Step 1: Prepare Your Skin Properly
Cleanse thoroughly:
- Wash your face with a gentle, non-stripping cleanser
- Remove all makeup, dirt, and oil
- Pat skin completely dry (never dermaplane on wet skin)
Why this matters: Clean, dry skin allows the blade to glide smoothly without slipping, reducing the risk of nicks and ensuring effective hair and dead skin cell removal.
Step 2: Optional Pre-Treatment
For dry or sensitive skin:
- Apply 2-3 drops of lightweight facial oil
- Allows smoother blade glide
- Reduces potential irritation
For normal to oily skin:
- Proceed with clean, dry skin
- No additional products needed
Step 3: Master the Dermaplaning Technique
Proper blade positioning:
- Hold the facial razor at a 45-degree angle to your skin
- Use your free hand to pull skin taut
- This angle is crucial for safe, effective exfoliation
Correct shaving motion:
- Use short, light, feathery strokes (1-2 inches)
- Shave in downward motions, following hair growth direction
- Never apply heavy pressure—let the blade do the work
- Wipe the blade clean after each stroke
Treatment areas:
- Forehead: Start from hairline, move downward toward brows
- Cheeks: Work from temples toward the center of face
- Upper lip: Short, careful strokes above lip line
- Chin and jawline: Gentle downward motions
- Neck (optional): Very gentle strokes on upper neck area
Areas to avoid:
- Active breakouts or inflamed acne
- Open wounds or cuts
- Extremely sensitive areas around eyes
Step 4: Post-Dermaplaning Care
Immediate aftercare:
- Rinse face with cool water to remove loose skin cells
- Apply hydrating serum to damp skin
- Follow with nourishing moisturizer
- Always apply SPF 30+ if dermaplaning during the day
What to avoid for 24-48 hours:
- Harsh active ingredients (retinol, AHAs, BHAs, vitamin C)
- Exfoliating scrubs or brushes
- Direct sun exposure without protection
- Excessive heat (saunas, hot yoga, steam rooms)
How Often Should You Dermaplane?
Recommended frequency:
- Every 2-3 weeks for most skin types
- Every 3-4 weeks for sensitive skin
- Weekly only if experienced and skin tolerates it well
This timing aligns with your skin’s natural cell turnover cycle, ensuring you’re removing dead cells without over-exfoliating. Listen to your skin—if you notice irritation, extend the time between sessions.
Safety Tips and Precautions
Who Should Avoid Dermaplaning
Do not dermaplane if you have:
- Active inflammatory acne or cystic breakouts
- Eczema, rosacea, or psoriasis flare-ups
- Sunburned or severely irritated skin
- Recent facial procedures (chemical peels, laser treatments)
- History of keloid scarring
Essential Safety Measures
Hygiene practices:
- Always use a clean, sterile razor for each session
- Never share facial razors with others
- Replace disposable razors after 3-5 uses maximum
- Store razors in a dry, clean location
Technique safety:
- Never rush the process—take your time
- Avoid dermaplaning in poor lighting
- Don’t apply excessive pressure
- Stop immediately if you experience pain
Infection prevention:
- Cleanse hands before starting
- Avoid touching face unnecessarily during treatment
- Don’t dermaplane over broken skin
Comparing At-Home Dermaplaning vs Professional Treatment
| Factor | At-Home Dermaplaning | Professional Dermaplaning |
|---|---|---|
| Cost | $10-30 (razor pack) | $100-250 per session |
| Convenience | Perform anytime at home | Requires appointment scheduling |
| Tool Used | Dermaplaning facial razors | Surgical-grade scalpel |
| Technique | Self-performed with caution | Licensed professional expertise |
| Depth of Exfoliation | Surface level, gentle | Deeper, more intensive |
| Risk Level | Low with proper technique | Minimal (professional oversight) |
| Results Duration | 2-3 weeks | 3-4 weeks |
| Learning Curve | Requires practice | No effort needed |
| Sanitation | Self-managed | Medical-grade sterilization |
| Best For | Regular maintenance, budget-conscious | Special occasions, severe concerns |
Our recommendation: Start with professional treatment to understand the process, then transition to at-home maintenance for cost-effectiveness and convenience.
Maximizing Your Glass Skin Results
Skincare Routine Enhancement
After dermaplaning, optimize your routine:
Morning:
- Gentle cleanser
- Hydrating toner or essence
- Vitamin C serum (wait 48 hours post-dermaplaning)
- Lightweight moisturizer
- SPF 50 sunscreen
Evening:
- Oil-based cleanser (if wearing makeup)
- Water-based cleanser
- Hydrating serum with hyaluronic acid
- Nourishing night cream
- Optional: face oil for extra moisture
Complementary Treatments
Pair dermaplaning with:
- Hydrating face masks 2-3 times weekly
- Gentle chemical exfoliants (on off-weeks)
- LED light therapy for collagen production
- Facial massage to boost circulation
- Professional treatments like HydraFacials quarterly
Lifestyle Factors for Glass Skin
Beyond dermaplaning:
- Hydration: Drink 8-10 glasses of water daily
- Nutrition: Eat antioxidant-rich foods, healthy fats
- Sleep: Aim for 7-9 hours quality sleep nightly
- Stress management: Practice meditation, yoga
- Sun protection: Daily SPF, even indoors
Common Mistakes to Avoid
Don’t sabotage your results:
- Using dull razors: Replace blades regularly for safety and effectiveness
- Pressing too hard: Light pressure prevents cuts and irritation
- Shaving against hair growth: Increases ingrown hair risk
- Dermaplaning wet skin: Reduces blade effectiveness and control
- Over-exfoliating: Combining with harsh scrubs damages skin barrier
- Skipping sunscreen: Newly exposed skin is vulnerable to UV damage
- Using active ingredients immediately: Wait 24-48 hours before introducing potent actives
Frequently Asked Questions
Q1: Does hair grow back thicker after dermaplaning with razors?
No, this is a common myth. Dermaplaning removes vellus hair (peach fuzz) at the surface level without affecting the hair follicle or growth pattern. Your hair will grow back at the same rate, thickness, and texture as before. The blunt edge created by cutting may temporarily feel different, but scientifically, shaving cannot change hair structure or growth.
Q2: Can I achieve glass skin with regular razors instead of facial razors?
While possible, it’s not recommended. Regular body razors have larger, flatter blades designed for different contours and thicker hair. Facial razors feature precision blades specifically engineered for delicate facial skin curves, providing better control and reducing irritation risk. Investing in proper facial dermaplaning tools ensures safer, more effective results for your glass skin journey.
Q3: How long does it take to see glass skin results from dermaplaning?
You’ll notice immediate improvements in skin smoothness and brightness right after your first dermaplaning session. However, achieving the full glass skin effect typically requires consistent dermaplaning every 2-3 weeks for 2-3 months, combined with a proper hydrating skincare routine. The cumulative benefits of regular exfoliation and enhanced product absorption create increasingly radiant results over time.
Q4: Is dermaplaning safe for sensitive skin or acne-prone skin?
For sensitive skin, dermaplaning can be safe when performed gently and infrequently (every 3-4 weeks). However, avoid dermaplaning during active inflammatory acne breakouts, as it can spread bacteria and worsen inflammation. If you have mild, non-inflamed acne or are acne-prone between breakouts, dermaplaning can actually help by removing dead skin cells that clog pores and improving product penetration.
Q5: What should I do if I accidentally cut myself while dermaplaning?
If you nick your skin, immediately stop dermaplaning and apply gentle pressure with clean gauze or tissue until bleeding stops. Cleanse the area with mild soap and water, then apply an antibiotic ointment and a bandage. Avoid using any active ingredients or makeup on the cut until fully healed. To prevent future accidents, ensure you’re using proper technique with adequate lighting and never rushing the process.
Your Journey to Glass Skin Starts Today
Achieving radiant glass skin with razors is an accessible, effective beauty technique that delivers professional-quality results without the hefty price tag. By understanding proper dermaplaning techniques, investing in quality facial razors, and following a consistent skincare routine, you can transform your complexion into that coveted smooth, luminous, translucent glow.
Remember, glass skin is a journey, not a destination. It requires patience, consistency, and proper care. Start slowly, listen to your skin’s needs, and gradually incorporate dermaplaning into your regular beauty regimen. With time and practice, you’ll master this technique and enjoy the confidence that comes with beautifully radiant, healthy-looking skin.
The path to your best skin ever begins with a single stroke. Armed with this comprehensive guide, you now have everything you need to safely and effectively use facial razors for glass skin. Here’s to your glowing transformation!
Disclaimer: While dermaplaning is generally safe for most people, everyone’s skin is unique. If you have specific skin concerns or medical conditions, consult with a dermatologist before starting any new skincare treatment, including at-home dermaplaning.